|
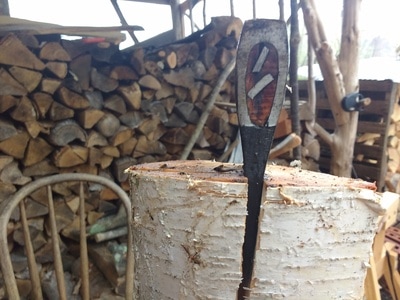
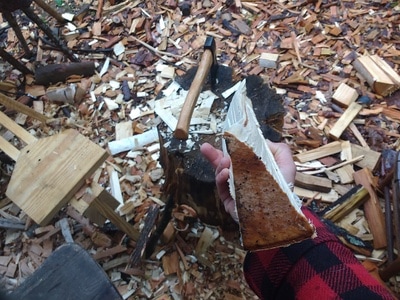
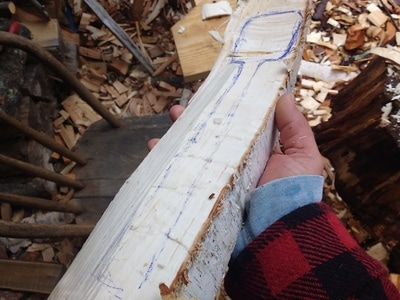
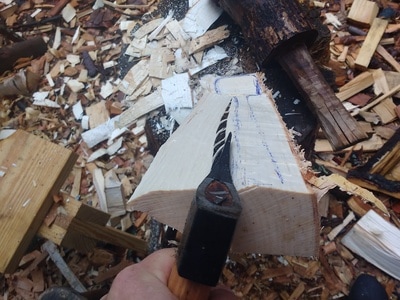
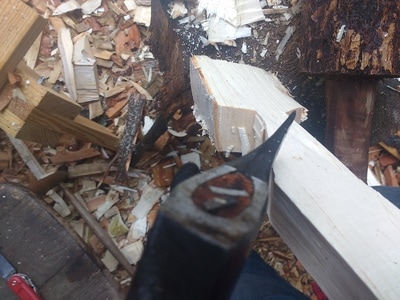
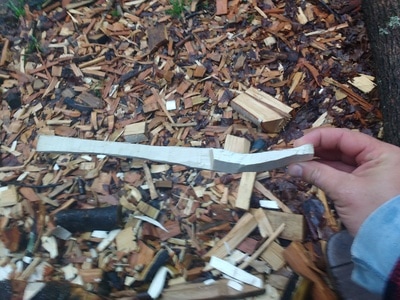
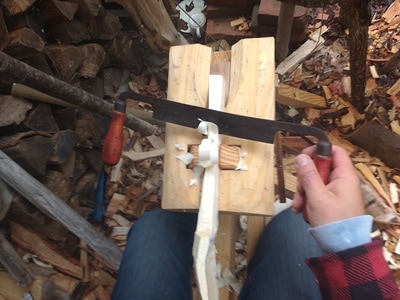
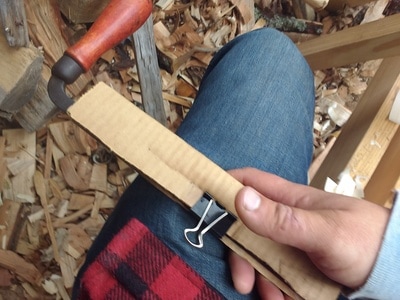
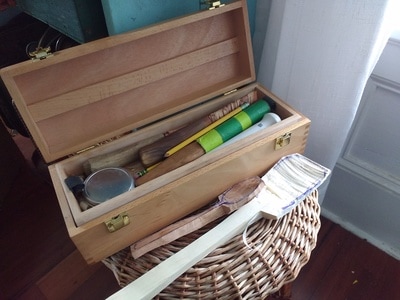
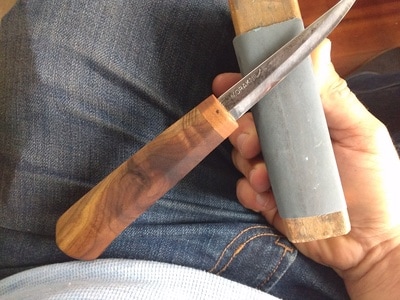
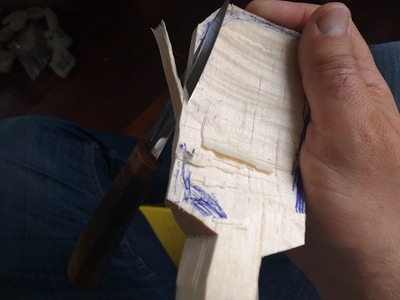
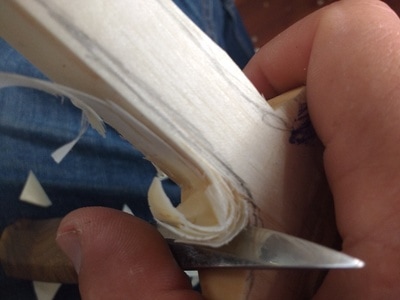
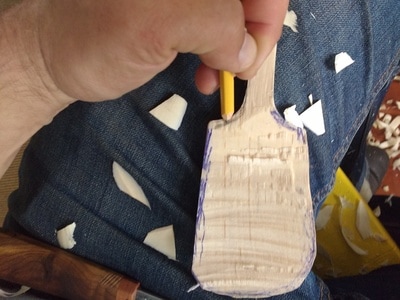
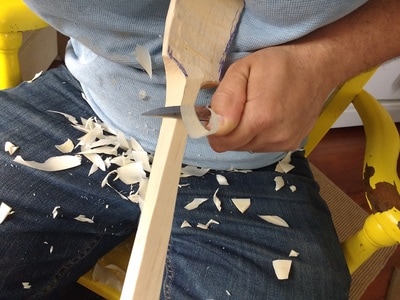
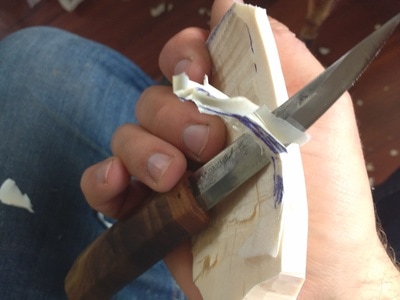
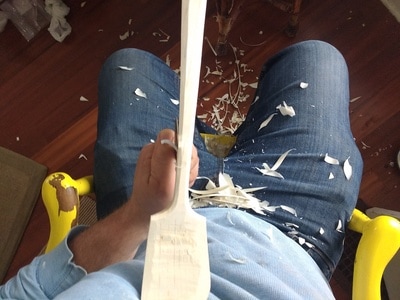
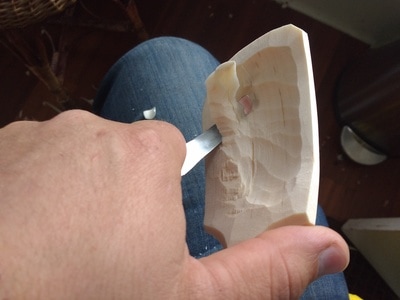
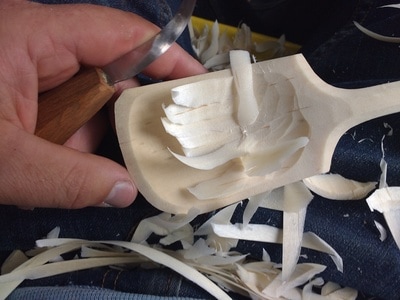
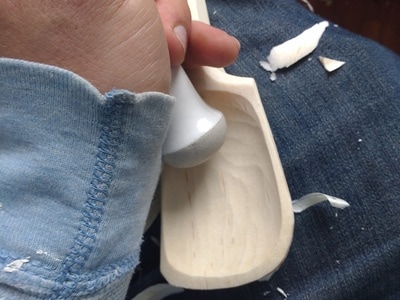
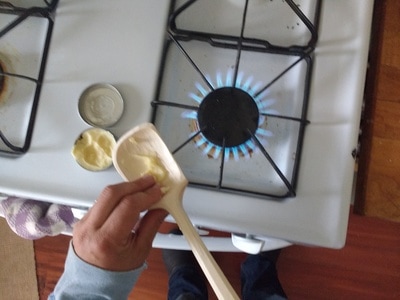
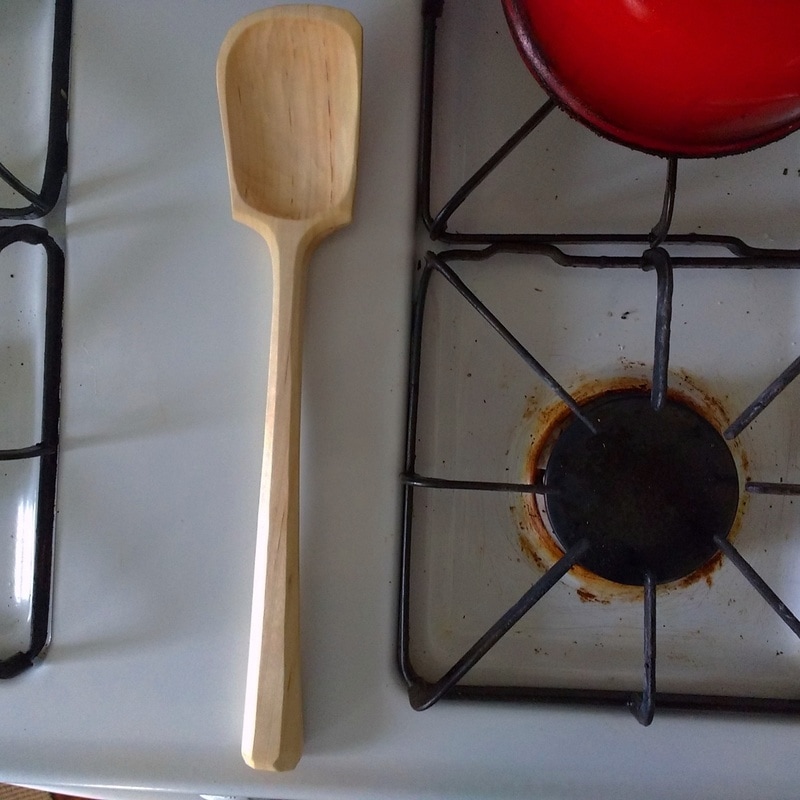
There are many ways to go about carving spoons. Some people use clamps and gouges at a workbench. Some people use shaving horses and spokeshaves. Some use spoon mules, some use bandsaws or twa cams (although fewer know how to pronounce it than use it) or --gasp-- even sandpaper. This is just my way of carving wooden spoons. It is guided by a desire to make spoons quickly so that I can sell them for an affordable price, and by the imperative that they must work exceptionally well. I am not drawn to ornamentation for its own sake. I am delighted by design elements that are organic and playful while existing for some functional reason. I use just a handful of simple tools, which will be introduced as they come on the scene. For me, a spoon always starts as a log which must be split. I never whack the back of my carving axe with another hatchet or sledge, since this can deform the eye over time (I keep a couple beater hatchets around where I do precisely this, however). Instead I use a simple club I made from a chunk of tree trunk by sawing around the circumference and splitting off the extra wood to made a crude handle. This will be visible in the background of some of the next photos. When I've split off a piece of wood that has enough room for my spoon within it, I turn it around to see if I can orient the curves of the spoon to correspond with natural curves in the grain. You can see in this photo on the right that there is a significant twist and curve to this piece. I then use the axe to cut the crank into the top face of the log. This is generally a shorter leg for the bowl and a longer shallower grade to define the top of the handle, although exactly how these play out has a lot to do with the needs of the piece of wood and whether I'm trying to take advantage of any changes between the heartwood and sapwood (see earlier Instagram posts about doing this with cherry and sumac). By doing this before anything else, I can make sure this is going to work before putting any more time into this particular chunk of wood. If it doesn't work out because my axe slips and cuts deeper into the bowl than I want or I go too deep and find I don't have enough depth, I can walk away just a minute into the process. This angle (the crank) is critical to the function of the spoon, so anything that messes with it is a deal breaker. Having established the top plane of the spoon, I saw off the excess at top and bottom and make two stop cuts into the neck from either side, being extra careful not to go too far on the back side. These stop cuts are also at least a quarter inch up from my actual line to give me some insurance against an errant tap of the axe creating a stress fracture within the wood. Now I use the axe and that club I mentioned before (see it?) to gently split the excess wood off the side of the handle. I prefer handles that taper to the neck because if you orient them correctly in the log, the wood splits and cuts cleanly down to the neck without running into it. But sometimes this is not the case and you need to cut sharply down to the stop cut with the axe to remove the waste. This takes longer but allows you to deal with less than ideal grain orientation. With the sides trimmed roughly, it is time to cut the back face of the spoon, generally leaving it a little deeper at the narrowest point of the neck. That deepest point of the crank is the place where the grain flow changes direction. All cuts flow away from it, towards the tip and towards the handle, with very few exceptions. At this point I could switch to the knife, except that I have the luxury of a spoon mule, a device that clamps the spoon handle and allows me to do further smoothing with a drawknife. This saves a few minutes, but most importantly, it makes this hogging out of bulk material easy and fun. Please also admire my very technical sheath to protect my drawknife edge. I do leave my axe buried in my carving stump, but it is important to keep all knife edges covered when not in use. This is both for safety and because nothing trashes an edge faster than a knock against anything metal or ceramic. Some people use the mule for a whole lot of shaping, but I tend to just do all four sides of the handle and the back of the bowl, and only for cooking spoons. Eating spoons are so small I haven't found the need to use the mule. It is also easy to remove too much with the drawknife, with limits your options for facets down the road, so I try not to overdo it. I mostly just want smooth curves. Note that the bevel on the drawknife is down, which allows me to pull out of curves more easily, and that the blade of the knife is slightly askew to the cut. Now I move to the knives. I used to keep my knives and other stuff in a cool galvanized box, but gradually I realized that it was only a matter of time until I bashed up a knife edge on the box which was always underfoot. I switched to a simple artist's box which has a top tray for my knives and burnishers and a bottom section for my sharpening rig. I sharpen my knives with loose sandpaper wrapped tightly around a chunk of wood (actually a block from my daughters' building blocks). By keeping my elbows in tight to my body I can isolate the motion enough to get consistent sharpening. I don't strop but rather go up to 3000 grit which I have found to be sufficient for easy carving and a good knife finish. Every couple of spoons, I give the blade a quick swipe on that highest grit to clean up the blade. Because spoons are curved in all three dimensions, the only way to accurately predict what those curves will be in the end is to isolate them and address them one plane at a time. The first task of the knife, therefore, is to cut the circumference of the spoon in a straight up and down line. It is also easy to over-carve the handle, because it is so much easier than the bowl that you return to it again and again to get that dopamine hit. Before you know it you have carved it too far and still need to do the bowl. So I always start on the bowl and get that trimmed to the line before I let myself move to the handle. Almost all of my cuts are one of two types: the push cut, where all the force is coming from the thumb of the hand holding the spoon, and the pull cut, where one end of the spoon is pressed into my sternum with the hand holding it out past the blade, and by keeping my elbows in, the motion of the blade is limited so it cannot cut me. Both the spoon and the knife turn around and pivot but the blade is always limited in its motion by either the extension of my thumb or by the pivot distance of my wrist. Occasionally I will plant my knife hand on my thigh and pull the spoon away for a planing cut, but generally speaking all of my cuts fall into one of these two camps. I know there are eleven named grips (or something like that) and some people like to know all their names and use them a lot. That is not me. I sailed for seven years on sailing ships and know more knots that you even knew existed, but there are four knots that do basically everything I want, and I don't feel the need to get fancy. Same with knife cuts. At this stage, I use a pencil to correct the symmetry and curves. It is tricky to see what change will bring a curve into sweetness and align the two sides, and I find the pencil helps me keep from having mission creep as I do this. Once I'm happy with the shape, I clean up the surfaces on the back of the handle and bowl made by the drawknife (depending on the type of wood, its freshness and the state of your drawknife blade, you can sometimes skip this step and leave the surfaces as is). Before bringing the back of the bowl to its final form, I carve the swoop of the bowl rim, since this determines exactly where the lines of the back will fall. Rather than carve the entire top face of the bowl to this curve, I prefer to carve a shallow bevel. This is much easier, but it does mean that as I refine the silhouette of the bowl I need to keep refining this curve, since it will change as the silhouette changes. Cutting this rim is a very awkward thing. One side uses a cut like peeling a potato, with the thumb braced on the neck, while the other side requires a floppy-wristed sort of pivoting cut. Just make sure to keep the hand holding the spoon up at the tip of the bowl, safely out of the way of the bowl. The temptation will be to hold the neck. Don't do that. I chamfer the back and top of the handle (generally with wide facets because they are fun and not fussy) and trim the end to shape. The nice thing about wide facets is that they give you the ability to sweeten the lines of the handle by shaving a bit here and there without having to re-carve them. I also tighten up the back of the bowl, and generally get everything as finished as possible before carving the bowl. Carving the bowl is achieved with an opening and shutting motion of the fingers holding the hook knife. Sometimes this is across the grain, sometimes at a 45 degree angle to the grain, and sometimes (especially at the end) it is with the grain. I like to rough out the basic shape and then creep up on the edge so I don't remove too much material too early. I am also mindful not to dig too deep and barrel right through the bottom of the bowl. Once the hook knife has created a clean curve to the inside rim of the bowl, I use the straight knife to carefully match this, and then give the rim a light chamfer that is angled outwards. With cooking spoons (as was the case with this one) this chamfer already exists and just needs to be evened up. With eating spoons this chamfer almost always needs to be cut, very carefully, all the way around. Because the angle makes it appear wider when viewed from above, I always get the rim of the bowl just slightly narrower than I want the finished dimension to be before making this cut. On eating spoons I then make the tiniest little chamfer on the inside rim to soften how it feels in the mouth. Such tiny chamfers are unnecessary on cooking spoons. The final step before finishing the spoon is to burnish it. I started burnishing with a smooth hard pebble, which worked fine. More recently I have started using a piece of cut down and polished antler and a ceramic pestle that I had kicking around. Both work well. By rubbing the spoon all over, I smooth and harden the surface and knock back any sharp corners that may persist. Burnishing is like a secret weapon, something few carvers talk about but that makes a huge difference. Finally, I finish the spoon with a 1:2 beeswax-jojoba oil mixture. I used to use linseed oil like everyone else, it seems, but I never liked the taste and the way it yellows the wood. While jojoba does not harden the way linseed does, it is tasteless, clear and the mixture smells divinely of honey. I smear it all over and then hold the spoon over the burner on my kitchen stove, moving it back an forth to keep the wood from scorching. The mixture gets sucked into the wood and the wood itself also hardens significantly. I wipe it dry and the spoon is done!
I generally shoot for one hour or less for my spoons. If there is a tricky knot and I am stubborn and don't abandon that piece of wood, it can take more time. But generally speaking, by systematically removing wood in a fluid structure, the process is fairly swift and certain. Thanks for reading! I would appreciate any thoughts you might have.
14 Comments
Nerdron
4/27/2017 06:44:44 am
Thanks for publishing this! I have just started out, and this gives me some great tips. I really need a spoon mule, right now I clamp the head in a vise while I shape the handle, and I crushed the bowl the other day doing that.
Reply
Paulette
10/6/2019 08:34:49 am
Hi, I have a bunch of "Starbucks" gift cards with a hole drilled in one corner that I put on either side of the handle to approximate the width of the bowl so that when I clamp the spoon in the vice it prevents racking and gives an even surface for the vice jaws to clamp the entire spoon not just the bowl.
Reply
4/27/2017 07:57:02 am
Thanks a lot for posting this, great to have an overview of how other people carve spoons! We do a lot of things similarly, and a few things differently. Thanks for sharing!
Reply
stephanie
5/2/2017 06:11:40 am
thank you. i too am just learning the craft. this is very generous of you to post and wonderful to read. it can't do anything but help me along.
Reply
Abhiram
3/15/2018 09:49:22 am
Thanks for the post! I am learning to carve spoons and the tips and the description will go a long way!
Reply
Greg
3/28/2018 12:46:01 am
New to spooning, looking for help.
Reply
Romney
4/10/2018 09:59:42 am
I am very new to wood carving and enjoyed reading your article. I only have an electric stove so is there an alternative in the drying process after applying beeswax/jojoba oil? Also, I have yet to find a site that simply lists food safe wood that can be hand carved.
Reply
Nice Article. Thanks for writing such a good article on wooden carving spoon. I am looking to try these tips for my wooden furniture manufacturing unit and my website www.birchi.in People always try direct method to carve furniture items but most of time these trick don't works. Your tips are helpful for the person to make good blog posting for their websites or blog.
Reply
6/19/2018 08:45:06 am
Education allows us to solve the mysteries. It gives us knowledge and understanding about something and anything. We get to learn the things and solve the things we get curious about. So we can not deny the importance of the education.
Reply
Gatis
4/7/2020 10:52:32 am
Thanks for this article! Much appreciate the content and the structure with pictures included. Nice work! I'm also a beginner of spoon carving and going through multiple advices from pro carvers, never heard of burnishing (or just missed it somewhere). That really seems to be working and logical too. Definitely will try this on some of my next spoons. All the best!
Reply
Chuck Baker
12/4/2020 01:26:33 pm
How do you measure the depth of the bowl so you don't go too deep?
Reply
Emily Fulcher Miles
3/22/2022 05:44:40 pm
Thank you for great tips. Learned a new trick to try. I have been searching for a hint like that with the stone.
Reply
Leave a Reply. |
Hi there!My blog has evolved into a series of short essays on the nature of entrepreneurship, craftsmanship, and their overlap. If either of these topics is something you think about, you will probably like this. Archives
November 2020
Categories |
 RSS Feed